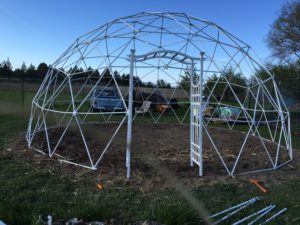
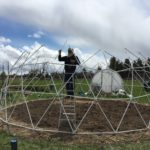
A couple of years ago, we bought a dome kit and then life got in the way of assembling it. But we had the area prepared and this year we put it up. I hijacked my vegetable garden for a medicinal herb garden. Witches are like that. We had put in a living greenhouse over in the apiary and I thought doing the same with the dome would be a cool thing to do i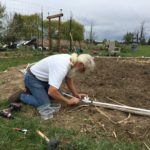 nstead of trying to decide on what kind of cover to use. So we got to work and began assembling the dome.
We used a dome kit from Sonostar Hubs. There are a variety of options from simple kits to kits that come with everything. We decided on a kit that was 12 feet tall and 24 feet in diameter. This particular kit went together flawlessly and I highly recommend this company. We bought a kit that included pre-cut PVC pipe but you can buy your own locally and use their dome calculator to see how much and what length you’ll need. Jerry painted each section with white paint and then he pre-drilled each hub. When it came time to assemble the dome, he used the holes in the hubs to drill each section of pipe, while I dutifully handed everything to him. I’ve doing that for the last 37 years so I’m an awesome assistant.
We assembled the bottom portion and then I arranged the first level using the enclosed diagram. Of course there were high winds throughout the process, averaging between 13 and 16 mph. But then wind is a part of life on the High Desert of Central Oregon.
The sides went up followed by a cross section, each level building upon the last. We had no problems with the kit whatsoever. Each section was color coded, making assembly simple.
A note about the ladders used. One was appropriate, one was my late mother’s. It’s the sketchiest ladder ever and no one has any business on it, least of all my 62 year-old husband. But he loves that ladder. So I held onto it for dear life during the wind gusts until he remembered he had a real ladder to use. We’re old now and sometimes the obvious escapes us. But you can see how the pattern emerges as more of structure goes up.
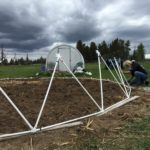
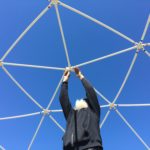
As you can see, a step ladder is now inside the dome, but I’m using it as a table of sorts. He tried to use it, but as a witch, a black belt, and his wife of 37 years, I have mad skills. Just a look. No words necessary. And in the picture to the right, he’s on the appropriate ladder.
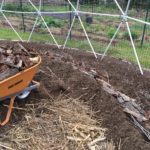
With the final piece in, we’re ready to begin the raised bed. We’ve opted to incorporate hugelkulture in our raised bed design. We did the same over in the apiary, and it’s supposed to help with moisture control. Hugel beds are used in dry climates as their structure soaks up water, holding it for future use by the plants. You can either dig down or begin at the top of the soil, but the idea is to lay wood down first, logs and sticks are great, logs in particular because they soak up and hold a lot of water. Then compost is added followed by soil. Compost can continue to be added throughout the growing season. Eventually, many hugel beds look rounded with plants growing everywhere. Jerry had heard about them and thought they were just the ticket for our dry desert home. Between the wind and the volcanic soil, we can water and then it’s dry again shortly thereafter. So it will be interesting to see how this raised bed design works.
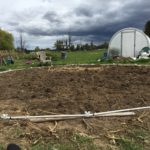
We began initially by creating an outer hugel bed around the edge of the dome using the same process in the picture to the left. We used logs and long sunflower stalks from last year’s garden as well as small branches. Then we watered it well, soaking all the wood debris, then covered it back up before beginning the dome assembly.
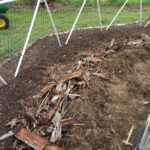 We raked back the soil around the inside perimeter of the dome, adding small logs, bark and other wood debris, watering it well. Next we added compost and soil that we prepared using top soil we had delivered from a company that usually has good top soil. Unfortunately this time around, it was full of rocks. So we won’t be buying any top soil from them anymore. It cost a fortune and the last time I actually got decent top soil.
After water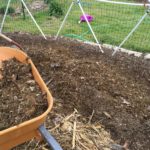 ing it all again the beds were completed and I began to plant. Eventually, the beans and peas will crawl up the netting on the outside of the dome. The tomatoes and peppers will flourish and the different varieties of lettuce will keep us in salad throughout the summer. Melons, cucumbers, zucchini, celery, radishes, onions, and spinach round out the veggies planted inside the dome.
Last but definitely not least is the center potato bed in the shape of a hive cell. 6 different varieties of potatoes are growing there and are already coming up. Everything else is coming up as well. One clematis I put in at the entrance isn’t doing as well as I would have liked but the other one is. It’s still alive though, so I’m hopeful. I have a honeysuckle I’ll put in next to it just in case. The grapes at the entrance are beginning to climb as the arbor and when my passion flower seeds arrive, I’ll plant a few at the entrance as well.
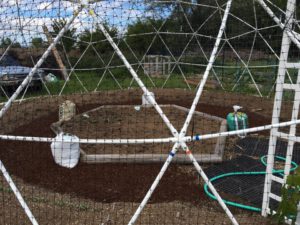
So there you have it. I finally have a dome greenhouse. I’ve wanted one for years. The beans will grow up at least to the top and if my hops ever come up in the herb greenhouse they’ll go on the outside as well.
And then, in the evening, I’ll sit out there with a cup of tea, experiencing the sacred geometry felt inside a living dome, life growing all around me, the hum of the bees providing all the music I’ll ever need.
~Blessings!
If anyone intends to either quote something I've written, or intends to post any part of my work, including my videos, on any other site, please ask permission before doing so. Any reposting of my work without permission can be considered as copyright infringement, so please ask. And if I give permission, you MUST clearly reference my name as author and my website. No exceptions. The words an author writes are sacred. Unapproved use is not.
Thank you... Jan Erickson
